Overview
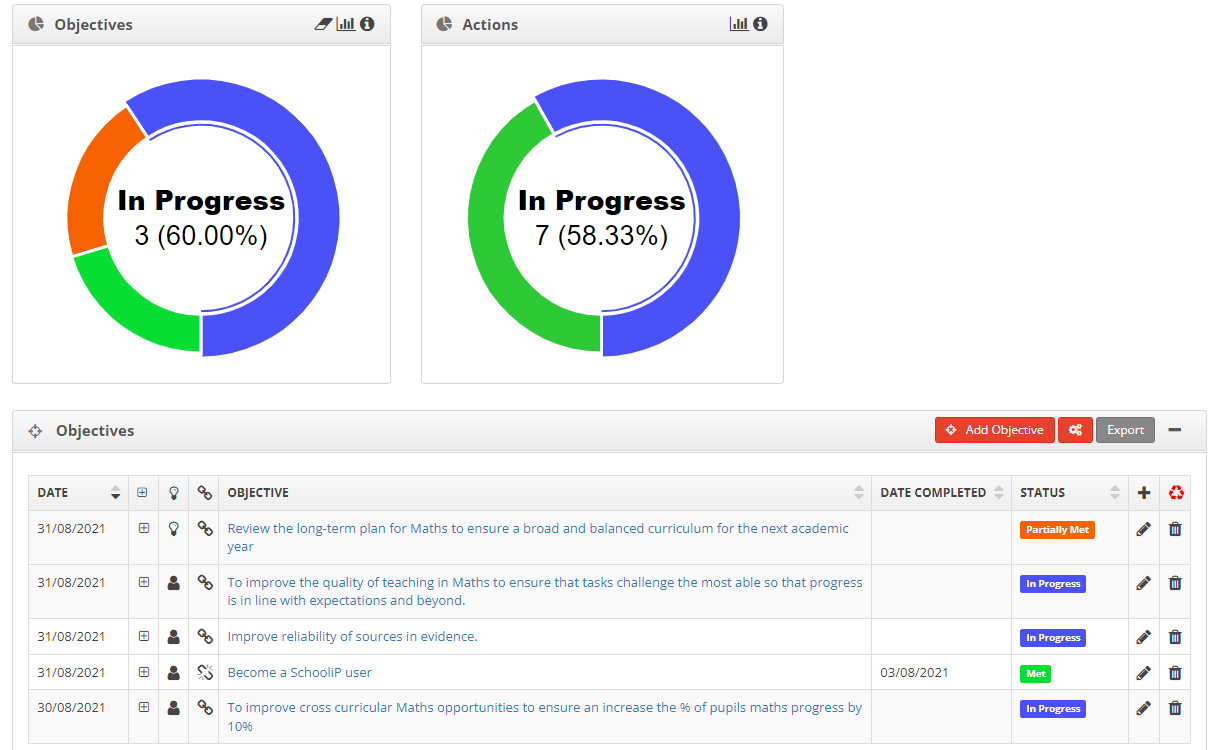
Selecting the Objectives option from the Portfolio Menu will shows a list of the objectives that have been set for the review cycle and there current status.
To view the full detail of an objective, click on the title of the objective. These details can only be changed if you have the appropriate user rights ('Manage Own Staff Performance Objectives') and Line Manager. Both the Lina Managers and Staff Members password may have to be entered to save the changes if staff agreement is turned on.
Adding an Objective
- Click on the Add Objective button.
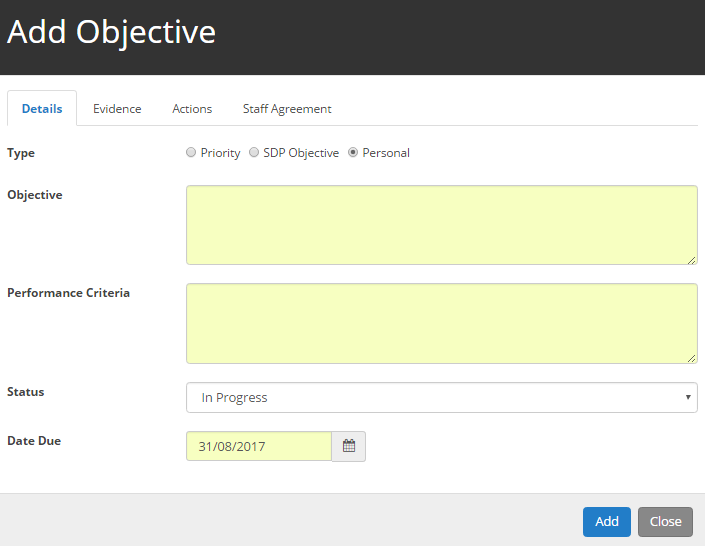
Details Tab
- This tab contains all of the details for the objective being set for the member of staff.
Type
- Choose the type of objective from the below types.
-
- Priority relates to one of the Whole School Priorities
- SDP Objectives relates to one of the School Development Plan Objectives that have been associated with the staff member
- Personal is specific objective for the staff member only
-
Option
- Select the Priority or SDP Objective that the objective is linked to (if relevant).
Objective
- Enter the objective, i.e. what is to be achieved.
Performance Criteria
- Enter the performance criteria for the objective, i.e. what success would look like at the end of the cycle.
Status
- This will default to In Progress, but can be changed if required.
Due Date
- Add a due date for the objective.
Evidence Tab
- This is where we need to stipulate to the staff member, what types of evidence we are looking for them to upload, to illustrate that they have met this objective i.e. Lesson Plans, examples of students work, etc.
Actions Tab
- Actions can be added to objectives in order to break the objective down into smaller, more manageable and time bound steps. Click on the text Click to add action and set the due date.
Staff Agreement Tab
- You may be prompted to enter both line manager and staff member passwords, if the staff agreement is turned on in the system settings
- Click on Add to save the objective.
Editing an Objective
- To make changes to an objective click on the pencil icon on the right of the table
- Then make the changes required and then select the Save button.
Removing an Objective
- To remove an Objective click on the bin icon on the right of the table. The Objective will then be removed from the table.
Restoring an Objective
- To restore an Objective click on the recycle icon on the top right of the table.
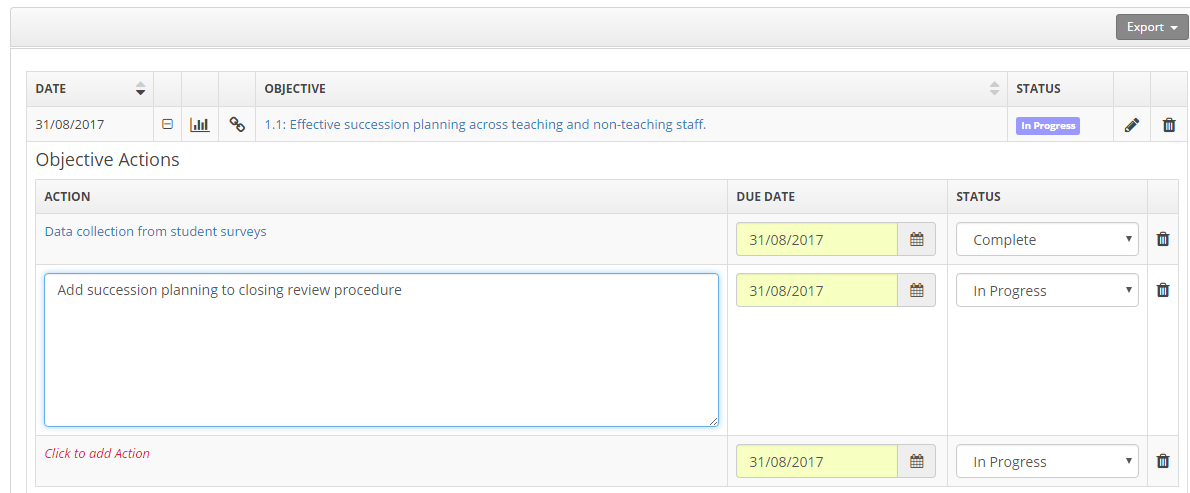
Quick Add Actions
- Actions can also be added by the reviewee in the Portfolio.
- Click on the
 icon to expand the objective.
- Click the Click to add action text to open the text box to add an action to the objective.
- Enter the action, due date and status.