Overview
This document covers the steps required in order to setup ADFS so that users are logged into SchooliP, CollegeiP, UniversityiP or ALTO with the same user details that are stored in Active Directory for them.
In order to setup Active Directory integration, perform the following steps in ADFS to add a Relying Party Trust.
Instructions
The system is now configured to use the ADFS login information and as such users should now use their network credentials to login to the system with.
If you have any questions about this process, or require assistance, please email support at customercare@derventioeducation.com or telephone 0333 0433 450 to speak to a support engineer.
Actions
Step 1
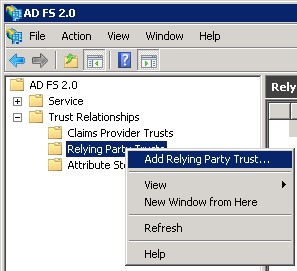
From the trust Relationships limb, right click on Relying Party Trusts and choose Add Relying Party Trust, as below.
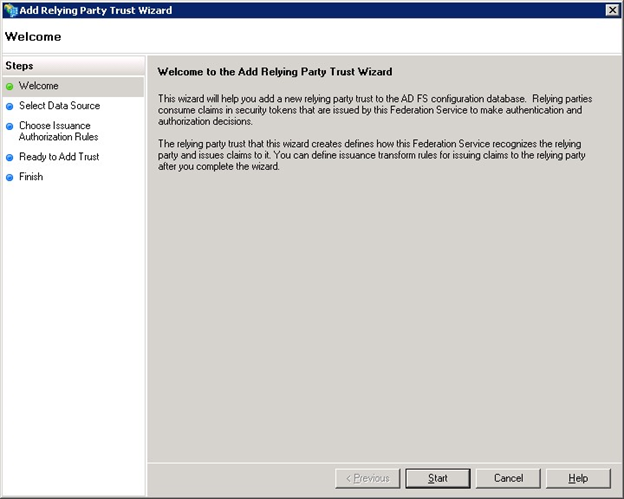
The following dialog should be displayed, click the Start button to begin the process.
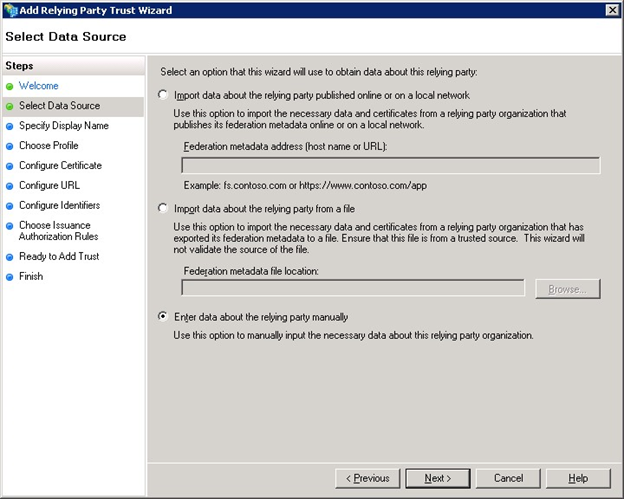
Choose to enter data manually as below and click the Next button to continue.
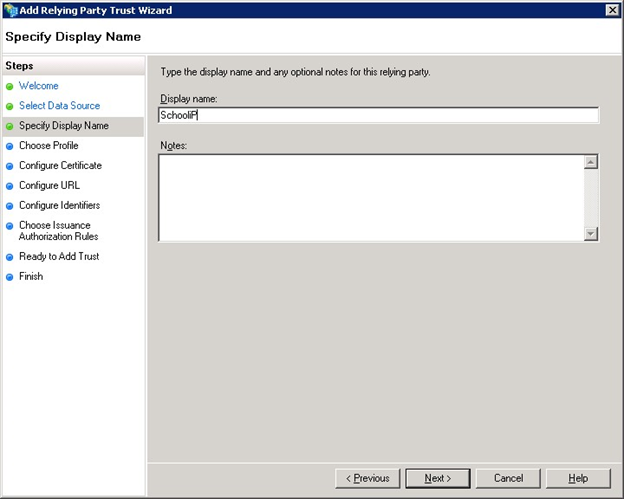
Enter the name as SchooliP, CollegeiP, UniversityiP or ALTO depending upon the product that is being configured. Click on the Next button to continue.
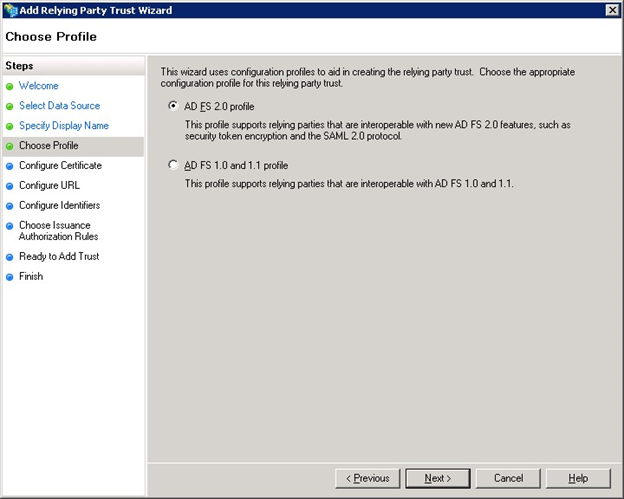
Ensure Ad FS 2.0 profile is selected and click the Next button to continue.
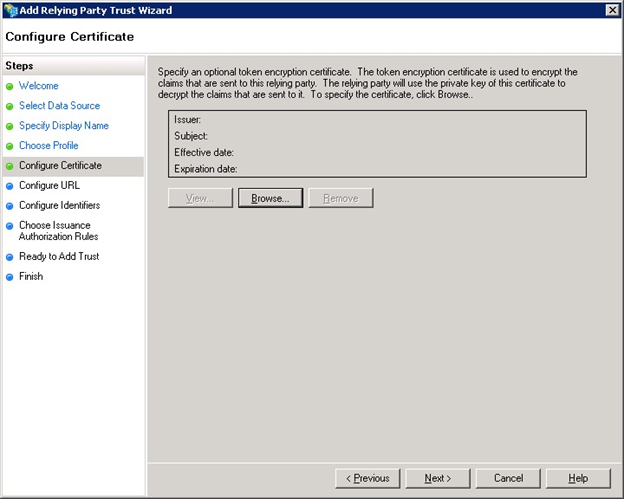
Accept the default values as below and click the Next button to continue.
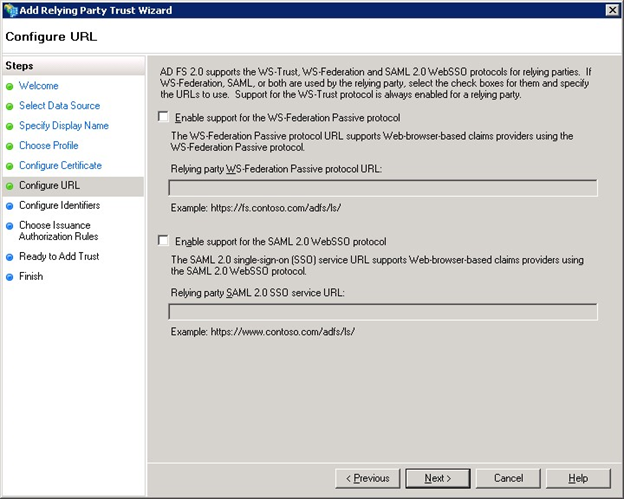
Accept the default values as below and click the Next button to continue.
Step 2
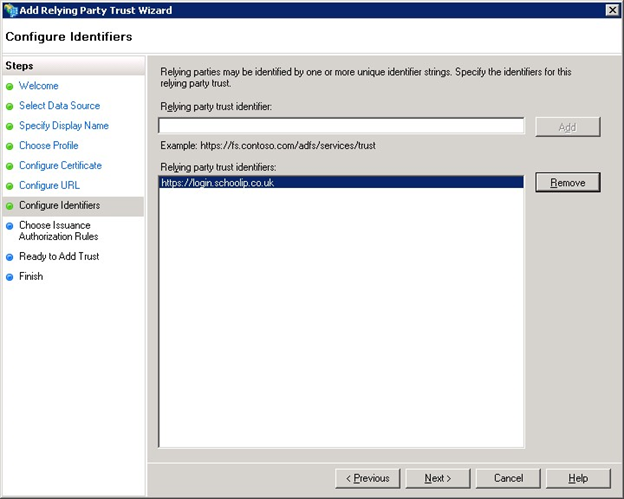
Add a new Relying party trust identifier with the value https://login.schoolip.co.uk for SchooliP, https://login.collegeip.co.uk for CollegeiP, https://login.universityip.co.uk for UniversityiP or https://login.alto-performance.co.uk for ALTO and click the Add button followed by the Next button to continue.
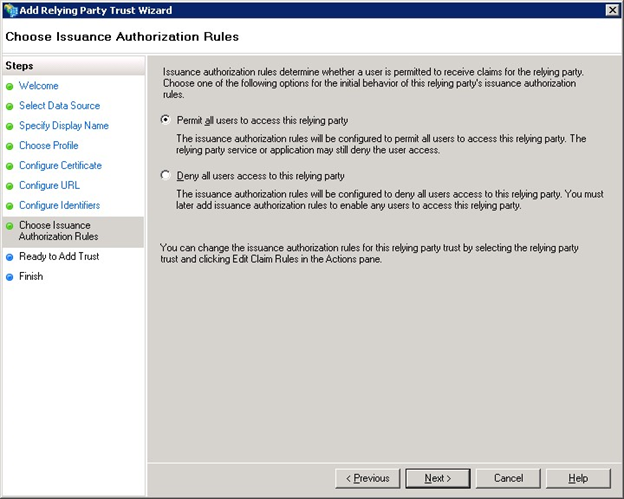
Ensure Permit all users to access this relying party is selected and click the Next button to continue.
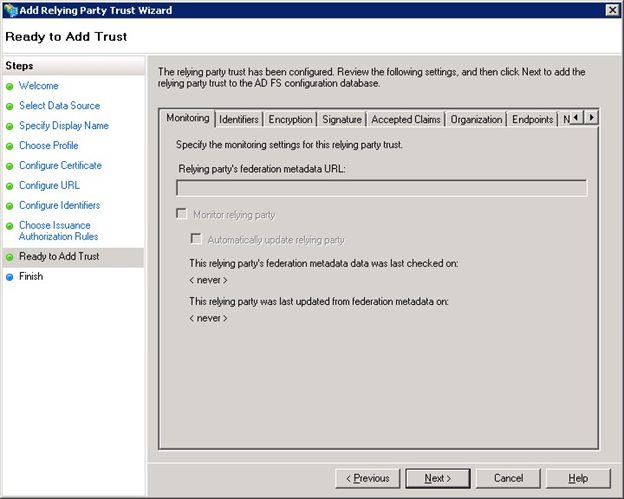
Accept the default values as below and click the Next button to continue.
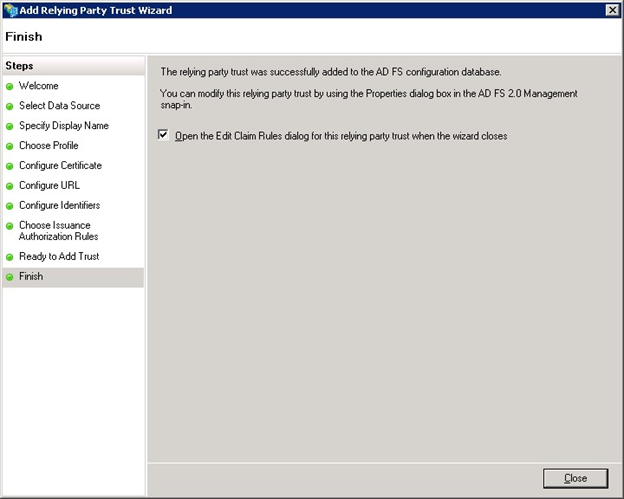
Ensure Open the Edit Claim Rules Dialog is selected and click the Close button to continue.
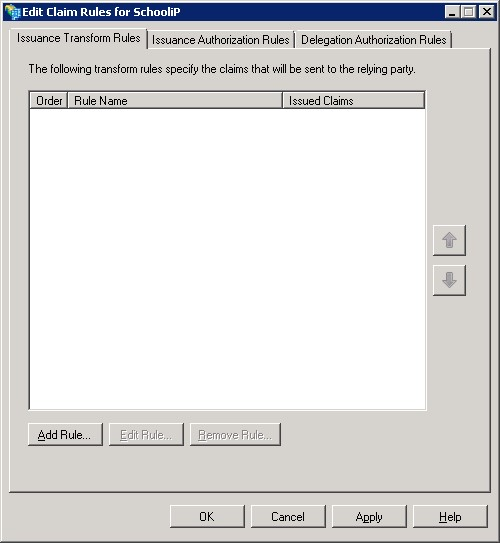
When the wizard closes the following dialog will be displayed, click the Add Rule... button to add the new rule.
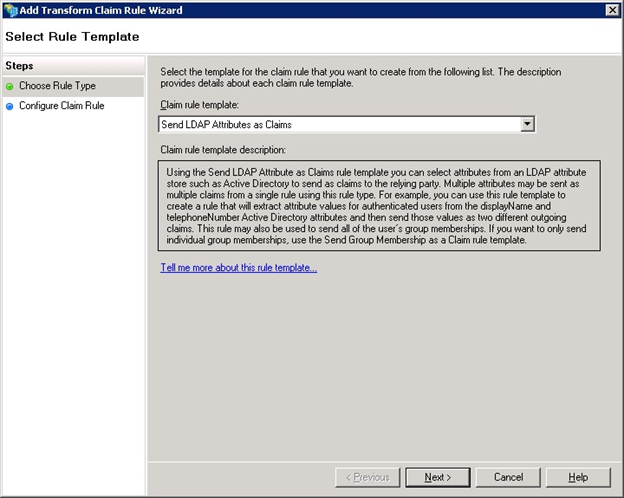
Ensure Send LDAP Attributes as Claims is selected as the Claim rule Template and click the Next button to continue.
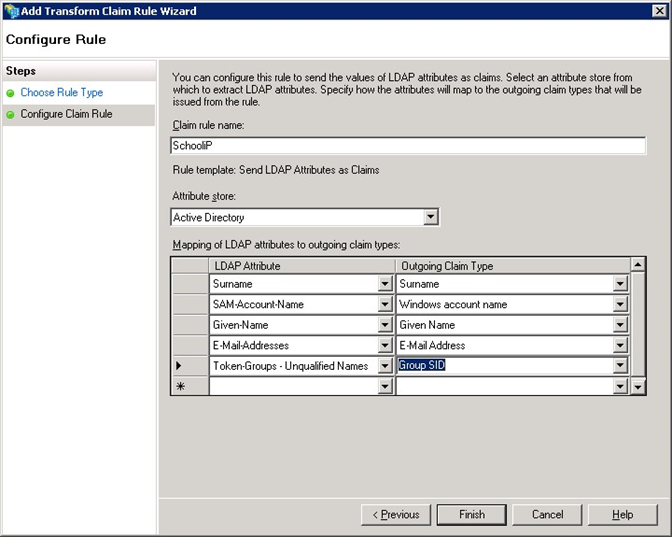
Ensure all the information is set as below. Make sure that the Claim rule name is set to the name of the product you are configuring, SchooliP, CollegeiP, UniversityiP or ALTO. Click the Finish button to save the details.
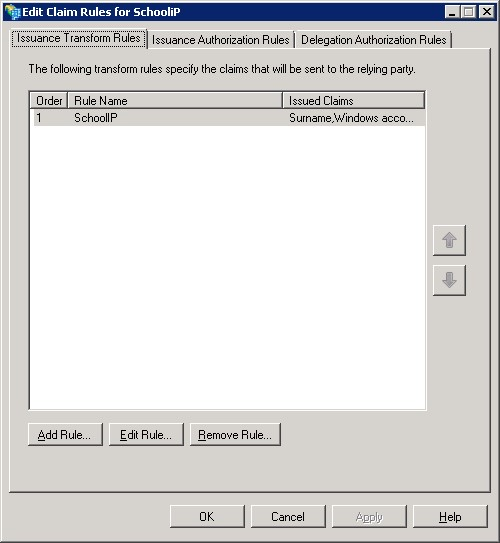
Finally, click the OK button to save the new rule.
Step 3
The final step involved sending a certificate file to Derventio Education to configure the Active Directory Settings.
To do this, take the following steps,
Click on the Certificates limb underneath Service inside the ADFS application as below.
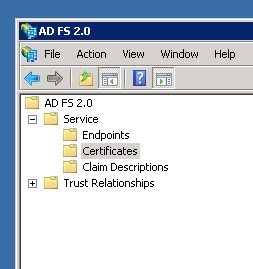
In the certificates panel locate the certificate inside the Token-Signing section that begins with CN=ADFS Signing.
Right Click on the certificate, and from the displayed menu, click on View Certificate.
On this screen there will be a button titled Install Certificate - click on this now.
The following screen should now be displayed.
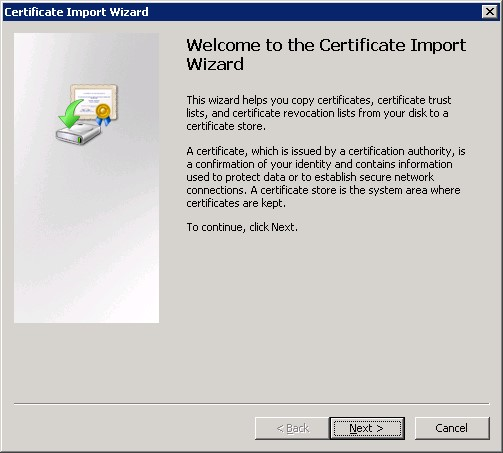
Click the Next button to continue.
On the Certificate Store page select the option to Place all certificates in the following store and click Browse. Choose Personal from the displayed list and click OK.
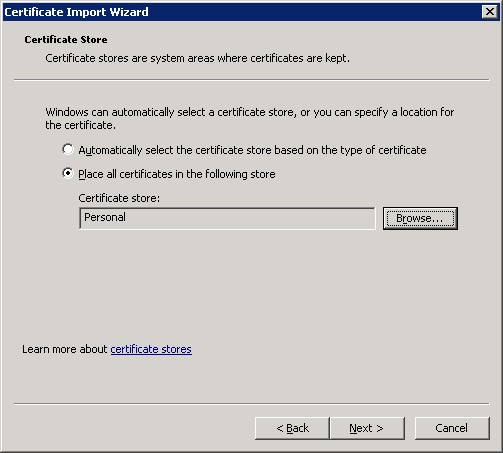
Click the Next button to continue.
The following screen will now be displayed. Click Finish to finish the wizard.
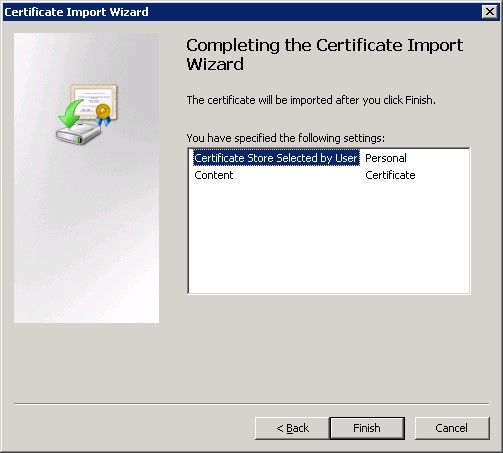
Now run the Microsoft Management Console (mmc.exe).
When this loads, add the Certificates Snap-in for the current ser, if it has not already been added, by clicking File and Add/Remove Snap-in.
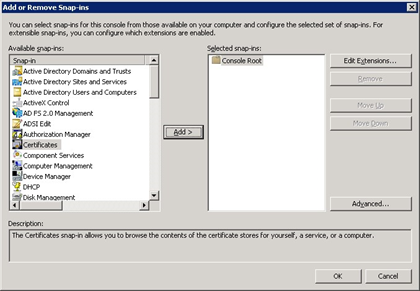
Locate the Certificates Snap-in as above and click on the Add button, selecting My user account from the list as below, and click Finish to add the snap-in to the Selected Snap-ins list.
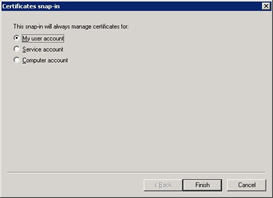
Now click OK to close the Add or Remove Snap-ins dialog.
Select the Certificates limb underneath Personal to display the certificate that was previously imported in the steps earlier in this document.
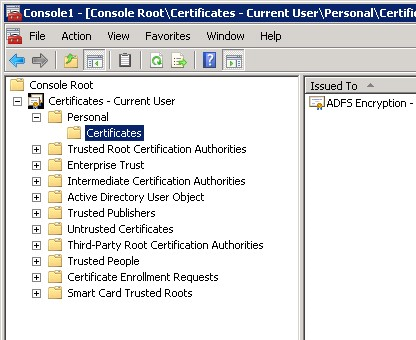
Right click on the certificate and from the pop-up menu that is displayed, choose All Tasks followed by Export.
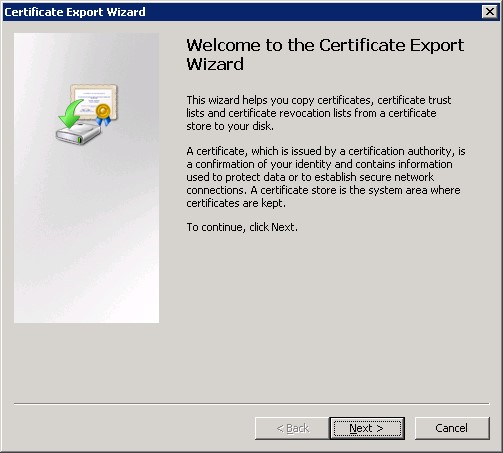
This will start the Certificate Export wizard.
Click Next to begin the Certificate export process.
Ensure that the DER encoded binary X.509 format is selected as below.
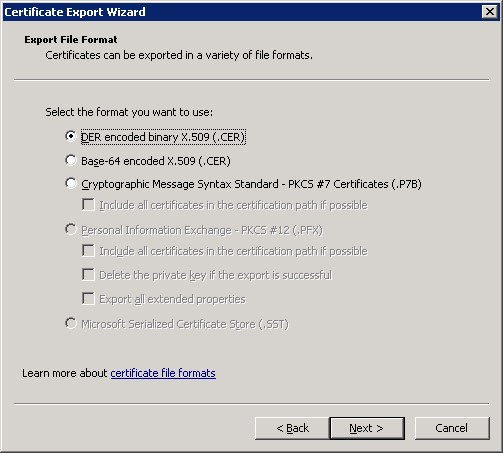
Click the Next button to continue.
Enter the location and name of the certificate that is being exported.
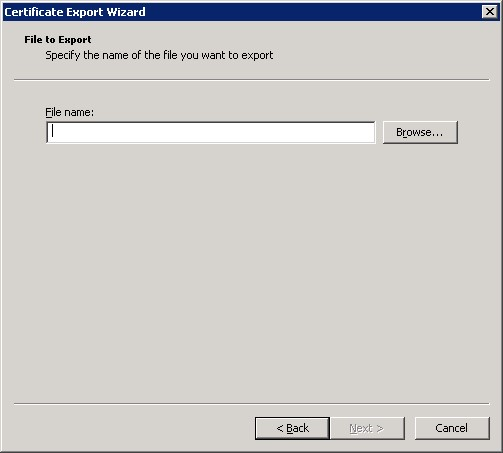
Click the Next button to continue.
Ensure that all the information is correct and click on the Finish button to export the certificate details.
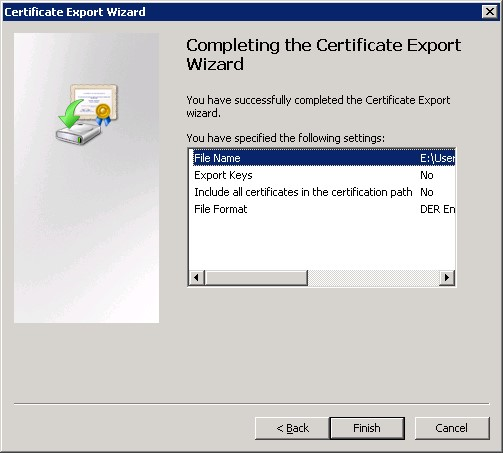
Two more pieces of information are required in order to configure the system to work with Active Directory.
First the external URL that has been setup for active directory web services to work externally will be required.
This would have been setup in conjunction with your DNS provider and may have required configuration on your firewall in order to allow external providers such as ourselves to integrate with your Active Directory installation.
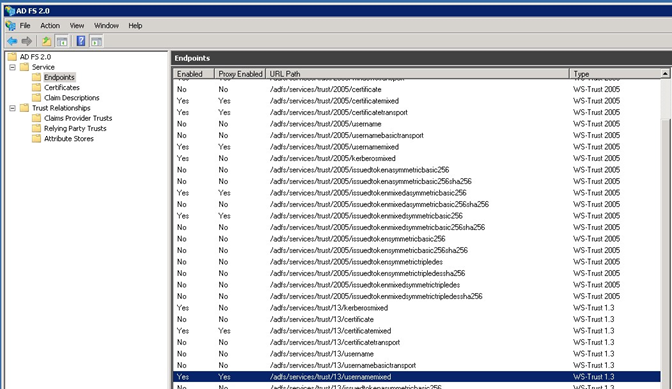
This should take the form https://adfs.<school>/sch.co.uk/ or https://adfs.<school>.ac.uk/, and as part of the configuration we would use this URL and postfix it with adfs/services/trust/13/usernamemixed which is the Endpoint from ADFS which should be enabled by default as below in ADFS.
The second piece of information required is the Group that users who are going to be using SchooliP form part of within your Active Directory.
To get this information go to Active Directory Users and Groups and select the Security Group that users are part of as below,
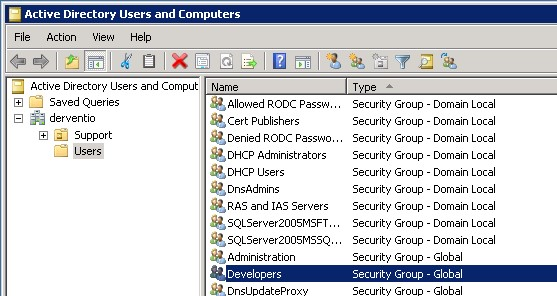
In the case of the above example, the group name is Developers.
ADFS 3.0 Configuration Only
If you are not configuring ADFS .0 then this part can be skipped and you can now go to the next section and configure SchooliP, CollegeiP, UniversityiP or ALTO.
For ADFS 3.0 you need to make additional configuration changes and checks.
- Ensure the Federation Service identifier URL matches the SSL certificate URL
- Using Windows PowerShell run the following command - "netsh http show sslcert", this will list all SSL bindings that are currently in use
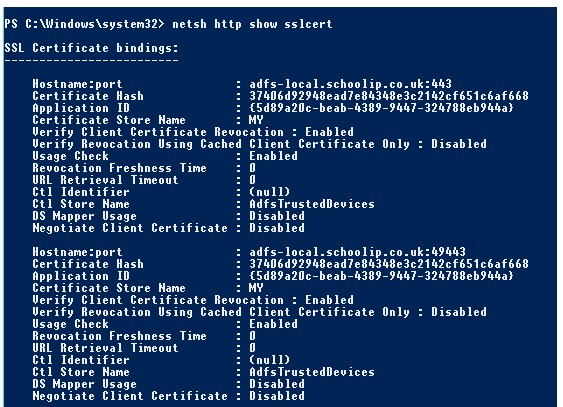
- Ensure that the SSL certificate used for your ADFS server is listed here
There should be two listing for port 443 and 49443, localhost should be optional.
The certificate should also be in the ADFS management tool under "Service > Certificates" for all 3 types.
Ensure all listings for past or unused endpoints/hostnames are removed as these can cause conflicts.
If this is not correct, run the following command in Windows Powershell to update the SSL bindings - "run Set-AdfsSslCertificate-Thumbprint thumbprint_here"
- The thumbprint should match the current SSL certificate (already available in the certificate store)
Now, log into SchooliP, CollegeiP, UniversityiP, or ALTO with your Administrator account and go to Settings.
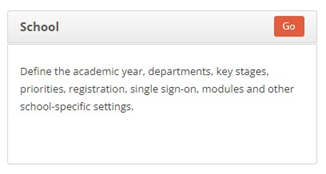
From the options select Go next to School as below,
From the displayed options select SSO and click the ADFS option as below,
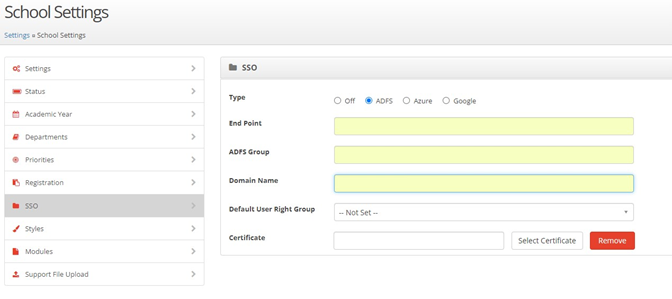
The End Point should be the external URL that was discussed on page 27 and take the form
https://adfs.<school>.sch.co.uk/adfs/services/trust/13/usernamemixed/ or
https://adfs.<school>.ac.uk/adfs/services/trust/13/usernamemixed/
The ADFS group is the group that was chosen earlier in the document.
The Domain Name should be set to the domain name of the establishment, for example myschoolname.com.
From the Default User Right Group dropdown select the rights group that will be allocated to new users who login using Active Directory for the first time.
Finally click the Select Certificate button and locate the certificate that was exported on page 26 of this document.
When it has been located, click on the Upload button to upload it.
When all information is setup correctly click on What Next and Save to save the ADFS configuration information.


