Overview
Academic Years are used to filter data so that only the most recent information is shown.
This would generally be set at the start of an academic year and run for a period of twelve months.
It is a straightforward process to set this up and only takes a couple of minutes, but will ensure reports and dashboards show the most recent, up to date information.
Location
Setting the academic year can be found in Settings, in the School section.
Click here to go there now.
Note that if the Settings menu is not visible, rights will not have been given to see that area.
Instructions
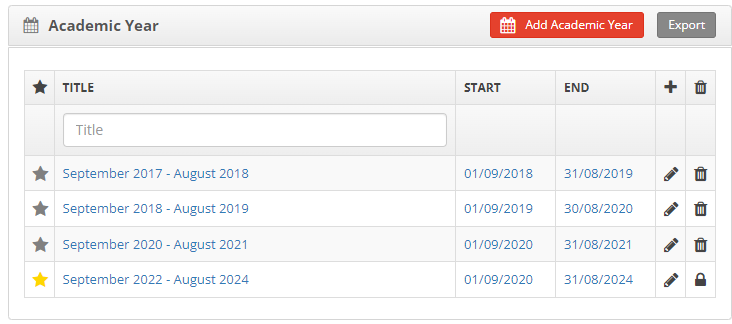
A list of all the academic years will be displayed as below.

This shows any current and previous academic years that have been setup in the system.
The current academic year has a yellow star next to it in the left hand column. Moving the mouse over the yellow star will show the text “Current Academic Year”.
Actions
Add a New Year
Click the Add Academic Year button or the plus (+) symbol.

Add the title for the academic year, ie Performance Review 2023-2024.
Add the start and end dates that the academic year will run for, this would typically be 1st September to 31st August but can be any date range required.
If this is going to be the current academic year then tick the box next to Set this academic year as the default. This will then be the default date range for information to be displayed when reports or dashboards are viewed.
Edit an Existing Year
To edit an existing academic year, click the pencil icon next to the academic year that is to be changed.
Edit the title and dates as required and tick or untick the box next to Set this academic year as the default? to make it the current academic year or not.
Delete an existing Year
To remove an existing academic year, click the bin icon next to the academic year that is to be removed.
Next Steps


